
If you haven’t already done so, you should read up on the first part of this build here. The first part of the build was to get the necessary parts needed for a bare-bones, 1080p 60fps gaming PC that did not need a graphics card. We did that because as most of you know who have been searching for the past year or more, graphics cards are almost impossible to find right now and at a decent price. Basically, if you want a GPU now, you’ll need to pay way over retail for one or end up picking something up you may not have wanted. Anyways, shortly before the build was completely for part 1, we did end up securing an NVIDIA RTX 3070 Founders Edition at MSRP. So our bare-bones build didn’t last that long and the addition of the RTX 3070 meant also the addition of some other parts while the case was open.

NVIDIA RTX 3070 Founders Edition
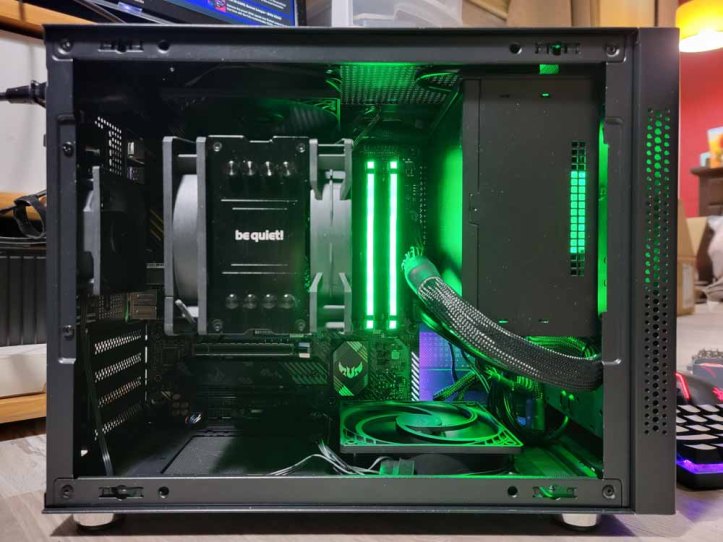
This wasn’t too difficult to add into our small form factor build. We actually left an ample amount of space where we knew it would go because we already had plans of adding a GPU later. The RTX 3070 is a 2-slot GPU though so we had to remove two of the PCIe covers on the rear. Of course, being a 2-slot GPU meant we were short on space under the card and could only mount one extra cooling fan underneath it.
We tried to mount two, but the use of the mATX motherboard limited us on space and the headers at the bottom of the motherboard were in the way when we had cables plugged into them. Not really what we planned, but there was nothing we could do about that. Plus, the power cables for the GPU also had to be routed through the bottom to keep them nice and tidy, and a fan here wouldn’t have worked because of this either. So instead, we’ll now leave this one, unused fan location for possible a future storage upgrade if needed.

ARCTIC P12 PWM PST 120mm Fans
Anyways, these are the fans we used. We ended up purchasing a 5-pack of these since we thought we could use most of them, but we ended up having two fans leftover. We ended up installing one extra fan at the bottom of the case as an intake fan, one fan up top as an exhaust fan, and an extra fan on the be quiet! Pure Rock 2 CPU cooler in order to create a push/pull system to help with temperatures.
First, we could also only fit one fan up top as an exhaust fan because our use of the larger ATX PSU also limited what we could do up there. One is better than none so we just worked with what we could. Next, we added that second fan to the CPU cooler because it’s been shown that a push/pull system can significantly decrease CPU temperatures over just having one fan in either a push or pull configuration.
So far, our temperatures have been fairly good with idle temperatures around 38-40 degrees C on the CPU and hitting around 44-46 degrees C when gaming. GPU temperatures however seem relatively unchanged.

AIRGOO DIGITAL RGB LIGHT STRIP KIT
So this build was mainly just getting lit up on one side of the case where the PSU and RAM modules were. That meant that the other half of the case was always dark and it just didn’t look right. We ended up purchasing an addressable RGB light kit by AIRGOO which was very easy to install. These strips have magnets on them so we were able to stick them to the inside frame of your case in a very well hidden spot. These strips also came with an adapter that is for use with our Asus Aura Sync 5V 3-pin headers as well as one for MSI motherboards.
Again, very easy to set up and I think it really completed the look of the interior of our case. Now if we want to show it off, we can have all our RGB on and if we just want to remain stealthy, we can turn them off in Armory Crate.

CORSAIR VENGEANCE RGB PRO 16GB-3200 CL16
While the initial build had 16GB RAM (2x8GB), we decided that with the added graphics card and heavier gaming loads we’ll be doing, we might as well get another 16GB to fill in those two empty DIMM slots on the motherboard. We plan on doing a lot of gaming, streaming, recording, and editing along with having multiple apps open while doing that. Plus, with more gaming coming out where recommended memory is around 16GB now, we figured with 32GN, we should be good for a very long time.
I should also mention these were on sale and we had a $10 reward at the store we had to use so this seems like a good pickup.
MORE UPDATES LATER?
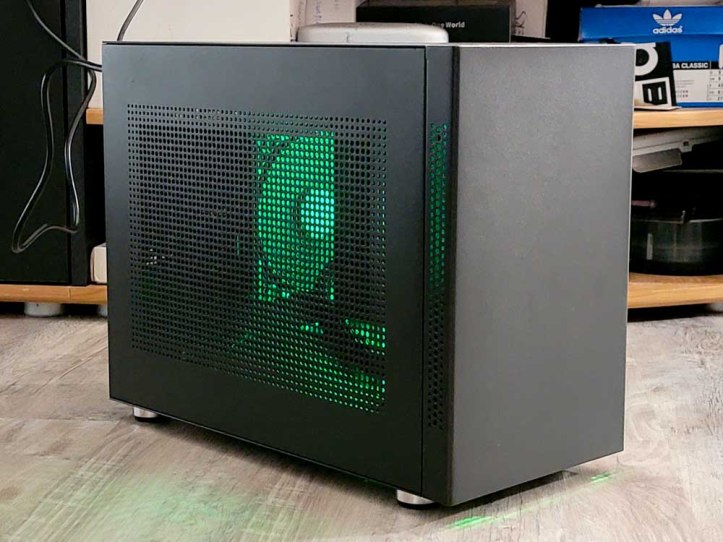
For the time being, this build which we’ve dubbed “STEALTHBOX”, is done. You can see the completed specs here. There isn’t much more spec-wise we can do to make it better, other than upgrade the CPU and more storage, which we are not going to do right now. Also, for most of the games we’ve been playing, this build is able to play them at high settings and high framerate, which is all we could ask for.
So that’s it for now. We may upgrade some parts here and there if we pick up some sponsored parts or test parts in the future. At the moment, this is a very complete build that costs us much less than what you’ll find at retail currently.
If you have any questions for us, leave a comment below, or if you’d like for us to possibly build you something similar or perform some upgrades, send us a message and we’d be happy to get back to you.
SHOP LINK
- ARCTIC P12 PWM PST (5 Pack) – 120 mm Case Fan
- Corsair Vengeance RGB Pro 16GB (2x8GB) DDR4-3200 CL16
- Addressable RGB PC LED Strip, airgoo 2×13.8in WS2812 RGBIC Rainbow Magnetic ARGB Strip
Please Support TheGamerWithKids
I love to bring you guys the latest news and reviews whether it be apps or gadgets, but hosting and maintaining a website can be expensive. If you would like to purchase any of the items mentioned on the site, please do so by clicking our links to Amazon first (when available) and then purchasing the items. This way, we get a small portion of the sale and this helps me run the website.

That’s a very tidy little build! You’ve done well with the component selection, it should keep you happy for a few years. I contemplated building a new rig earlier this year, as my “current” PC is almost an antique first gen i7 from late 2008!! It still just does the job after upgrading RAM, CPU and changing to an SSD HDD. Surprisingly copes with the latest games and lets me edit/render 4k video, but it won’t run the latest version of Davinci Resolve or a few new photographic editing programs I want to try.
Anyway, after some research, I came to realise the current high cost of GPUs as you alluded to (though reasonable prices can be had if you hunt around). I was also looking at an Intel build – and now (or then) the current Intel CPU had fallen behind AMD’s offerings. Also, back then with Windows 11 looming on the horizon and indicating special hardware requirements, after some consideration, I decided then was not the right time to build a new machine. It was a worthwhile exercise though and will give me something to compare with in a year or so when I consider again. For now, the old antique will hopefully keep serving me well 🙂
Thank you for the compliments. Yeah, I was sitting on about an 11-year-old computer and thought it was about time to build a new one.
[…] into PC gaming myself. After building my first gaming PC, which you can view here and the update here, my cousin too wanted a new gaming PC so that we could play together. So with that, we gathered up […]