
You’ll probably notice that we are featuring a bit more PC games here now and that’s mainly because I’ve gotten into PC gaming myself. After building my first gaming PC, which you can view here and the update here, my cousin too wanted a new gaming PC so that we could play together. So with that, we gathered up all the parts we could that were on sale this holiday and he was even able to score an RTX 3060 Ti at a fairly reasonable price.
Since I’m the type who does not really like building the same thing twice or having someone copy a build exactly, we chose a slightly different route for his build. You can check out the parts list below.
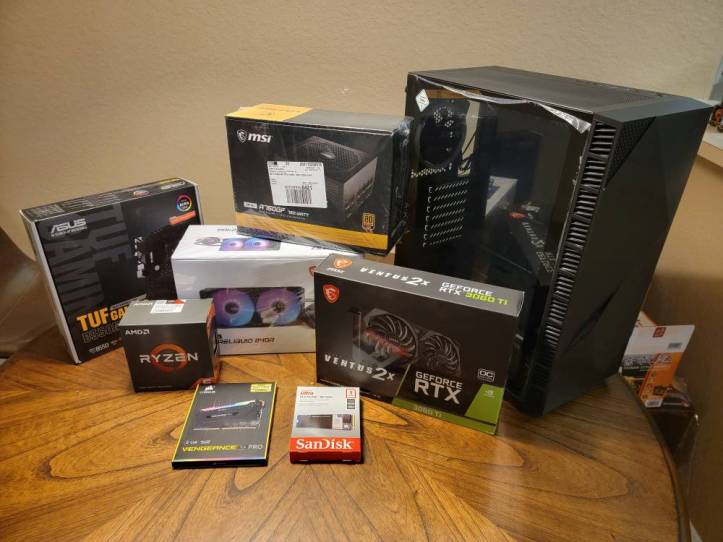
PARTS USED
Many of these parts were purchased from Amazon, with a few from Best Buy. Whoever had the best prices at the time basically got the business. The links below are from Amazon.
- Case: Zalman Z3 Iceberg ATX Mid Tower
- Motherboard: Asus TUF GAMING B550-PLUS mATX AM4 Motherboard
- CPU: AMD Ryzen 5 5600X
- Cooler: MSI MAG Series CORELIQUID 240R, aRGB Liquid Cooler
- Graphics Card: MSI Gaming RTX 3060 Ti Ventus 2X
- Memory: Corsair Vengeance RGB Pro 16GB (2x8GB) DDR4-3200 CL16
- Storage: SanDisk Ultra 1TB PCIe NVMe SSD (Best Buy)
- Power Supply (PSU): MSI MPG Series A750GF PSU 740W 80+ Gold
- Extra Fans (2): Zalman RFD120A 120mm Cooling Fans
As you can see, we went with many MSI parts this time around, mainly just to match up with the GPU. As much as we would have also liked to go MSI with the motherboard, he couldn’t find one at his budget at the time, so he went with the ASUS TUF-Gaming B550, the same board I also used. It made installation slightly easier as we already knew what to do this one and where to plug everything into.

He also wanted to go with a much bigger case, just in case he had any plans for future upgrades. Plus the larger case made things a bit easier to work on. The case is a Zalman Z3 Iceberg with decent cooling and cable management in the rear. The tempered glass side panel was also a must for him. One small issue we ran into however is due to the way the fans are made here, the use of several hubs was necessary which caused a bit of a nest in the back, due to extra cabling needed that otherwise wouldn’t have been needed.
Once all the panels are one though, you can’t really see the cables anymore so no big deal. He was happy with just having it look super clean in the front where you could see everything. This build went fairly smoothly and he’s now able to game on PC in 2K and high framerate.
UPDATE: There were two additions made after I had completed this post. Mainly a second SanDisk 1TB NVMe SSD was put in as a storage drive and another 16GB RAM was installed to make it a total of 32GB RAM.
If you have any questions about this build, please leave a comment below and we’ll definitely try to answer them as best we can. Thanks!
Please Support TheGamerWithKids
I love to bring you guys the latest news and reviews whether it be apps or gadgets, but hosting and maintaining a website can be expensive. If you would like to purchase any of the items mentioned on the site, please do so by clicking our links to Amazon first (when available) and then purchasing the items. This way, we get a small portion of the sale and this helps me run the website.
